I want to make a special gift for him so made a notebook. He likes quilting and patchwork so - the patched cover was the only possible decision.
I have so much fun sewing this sketchbook so want to make a tutorial if somebody want to give it a try.
Preparing the cover
I have white cardboards 6 x 12 inches, and decided to use them and made covers a little bit bigger than sheets.
Cut a piece of fused paper and order precut pieces to cover it.
Iron pieces to stick them on the paper and quilt as you desire.
Cut a piece of felt the same size as to patched cover is.
I want the plastic cover so Laminate 2 transparent sheets and cut squares to put inside
Place the laminate squares (see the next photo) and draw a line round each of them. This mark will help you to gather easy to the patched cover.
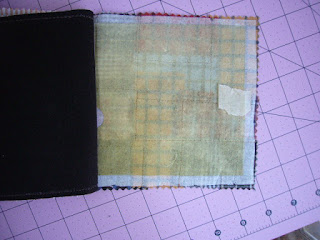
Trim the fabric that exceed the felt.
Put the patched top with the fabrics (face) down then this item with
lining up, pin and gather them with a rechtangle stitching as shown on the next
photo.
Now comes the tricky tip
Place the laminated squares inside and fix them with small pieces of tape.
Stitch together keep in mind to sew outside the seam that hold together felt an lining.
See the upper cover's corner on the photo - there are two stitches side by side.
Till now I have the finished cover.
As I wrote at the beginning I have cardboard 6x12 inches an fold them in half and collect 3-4 sheets in a signature.I prepare 6 signatures.
Making the paper body
You will need a bradawl, a wooden corner and a piece of paper to mark the place where you have to make holes.
Mark the 4 holes - at about 2 inches one to another.Keep in mind to make marks symmetrycally.
Put this auxiliary paper inside each signature and make the 4 hols.
Use the same piece of paper folded to mark place for sewing on the cover.
Note that distance between two cover has to be divided on number of signatures - for me they were 6.
1/8 inch (3 mm) is enough distance between two neighbouring marks.
The threads.
The thread should be strong enough when you pull out them. Perle cotton is a good idea - if you need colored thread.
The necessary length - measure the length of the cover's back and multiply numbers of signature plus one more length.
In my case - 6 inches x 6 signatures + 6 inches.
It is good to wax the thread before sewing.
Thread a needle, make a knot at 2 inches ftom the end and begin.
Keep loose thread to see the marks and at the last hole pull out and tighten the thread.
At the end of sewing first signature the needle should be outside the cover.
Repeat the same with the next one .
When finished this one you will meet the knot where the stitching began. make additional knot to secure the end of thread.
Go ahead with next 4 signature doing the same stitching.
Finishing
At the end - pin the needle back into the cover and signature. Make a loop.
Cut the ends.
You are finished with sewing and the back looks this way
and the inside -
I have added a bottom and a cord for closure.
Try to make one and show your finished notebooks.
Enjoy!


No comments:
Post a Comment